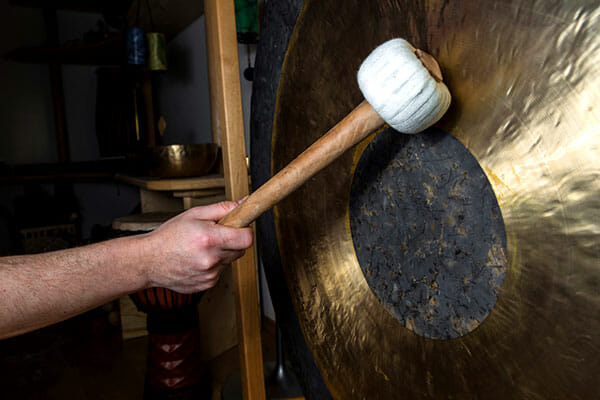
A gong without its mallet is just like a drum without drum sticks or a violin without its bow. It is not completely useless, but it isn’t useful either. The kind of mallet used to play the gong makes a huge difference in its sound quality.
Sometimes the mallet you buy does not produce the sound you desired or is not compatible with your gong. Fortunately, you can make a gong mallet on your own with a few tools and the basic understanding of the elements which make a great mallet.
I have written a complete guide to help you get started on DIY-ing a gong mallet. Let’s begin.
Table of Contents
- Factors That Define Gong Mallet’s Quality
- Materials Needed To Make A Gong Mallet
- Instructions To Make A Gong Mallet With Yarn And Cord
Factors That Define Gong Mallet’s Quality
There are several things to consider when making a mallet, as it affects the tone, characteristics and response of your gong. Typically, the main things are:
- Size of the mallet head.
- Feel of the mallet head in regards to its hardness and softness.
- Shape of the mallet head and length of the mallet.
- Weight of the mallet head and its handle.
- Fabric used for the mallet head.
As a rule of thumb, a hard and small mallet head produces a brighter and sharper tone. Whereas, a softer and larger mallet head produces a warm and mellow tone.
Materials Needed To Make A Gong Mallet
The materials required to make a gong mallet can be easily bought from a local stationary store (or online) at affordable price. You will need:
- A stick (any material, length and size).
- Material for Mallet head (will go into its detail below).
- Filament tape and glue.
- Large sewing needle.
- Yarn or cord.
- Scissors.
Instructions To Make A Gong Mallet With Yarn And Cord
Mallet heads with yarn are suitable if you prefer a softer mallet. Since they are easier to work with, it is recommended that you start a DIY mallet project with a yarn.
Whereas, a cord is used for harder and more sturdier mallets. They can, however, fall apart if not wrapped with precision. Let us walk through the steps of making a mallet with both of these materials.
Make Space To Carry Out The Mallet Head DIY Project
- Gather all your stuff in a safe work station which is not accessible to the kids. Or make some space in your room or garage to do all the work.
- Make sure all the required materials are at your hand’s reach for efficiency.
- Take your stick, a wooden one is a better option since it has a good handle and will last longer.
Start By Making The Core/Base
- Cover the end of the stick with the filament or strapping tape. Make sure to keep a 1-inch distance from the stick’s end to the tape’s core. This forms the core of the mallet which determines the mallet head’s shape and size.
- Make sure to wrap the tape evenly and as tightly as you can to create a strong core. The number of times you wrap around the tape depends on the thickness you want. Ideally, a 3-4 inch thickness is preferred.
Start The Yarn Or Cord Wrapping Process
- Now is the time to wrap your yarn or cord. Both are wrapped in similar manner, but produce different tones.
- Hold the end of the fabric with your thumb on the base of the core and with your other hand start wrapping it.
- Make sure to wrap the yarn or the cord as tightly as you could, in a clockwise motion and to loop the fabric from the top of the core and not around it. Also, do not release your thumb from the fabric end at least until you have completed 10 rounds.
- Wrap the fabric while keeping even spaces between each loop to prevent a lopsided mallet head. Also, wrap the fabric from the sides instead of from the top to maintain a small space on top of the stick which is not covered with the fabric.
- Keep wrapping until the mallet has reached the thickness and size as per your preference.
- Once it has reached the desired size, it is very important that you never leave your thumb off of the wrapped fabric as it could easily unravel, wasting all your efforts.
Prepare To Cross-Stitch
- Now is the time to finish up, this is done by cross-stitching. In this step, you will need help from someone as you are not able to release your thumb from the last round of the fabric.
- Cut the yarn or the cord leaving a minimum of 1.5 to 2 feet excess. Ask someone to thread the needle for you.
- After the needle has been threaded, pierce the threaded needle underneath the top of the fabric. This requires a certain amount of force as the fabric is wrapped tightly.
- Then bring the needle upwards, be careful to avoid any knots and repeat until you have gone all around the top.
- The same method should be applied for cross-stitching the bottom of the mallet head. Also, do not finish off all the fabric in cross-stitching.
- After you are done with the bottom, make a loop with the excess fabric, take the needle under it to make a knot and pull it tightly to prevent the fabric from unravelling. You can make a minimum of 3 knots.
- Cut the excess fabric after making the knots.
- That’s it, you have successfully created a yarn/cord mallet which is ready to be used on your gong!
In a similar manner, instead of a tape core, you can use a cricket ball or any other plastic ball as a core by making appropriate-sized holes on them. And then wrap yarn or cord over them. This creates a rounder and larger mallet which can produce deeper tones.
Frequently Asked Questions About Gong Mallets and Gongs
What is a Gong?
A gong is a percussion instrument originating from China’s Western region. It is a flat, circular metal piece with a central dome in some. The gong produces a vibrating sound similar to a bell when hit with a mallet or a hammer.
What are the different types of Gongs?
Gongs differ in size, style, and shape. Such as, some gongs are flat, whereas most of them have a central dome.
Generally, gongs are of two types: Suspended and Bowl. Suspended gongs are flatter and of course, suspended. They are hung using a cord which passes through the holes in the rim. Suspended gongs are played with gong mallets or a bamboo stick.
Bowl gongs are, as the name suggests, bowl-shaped. They can be placed on the ground or on cushions specially made for them. Bowl gongs are played in several different ways and are used for sound healing purposes.
What is gong healing?
It is a method of sound therapy in which the sounds made from a gong are played to assist healing. The gong is specifically played softly to induce a feeling of relaxation and a calm state of mind.
Which gong mallet is best for a large size gong?
The IKN Gong Mallet is the recommended one. It is lightweight, features a comfortable stick and the mallet head is made with wool core and wool.
Final Thoughts In conclusion, I would say that a beginner doesn’t need to spend money on buying a branded mallet when he can make one so easily. Making a mallet with a few items bought from the craft store is a better option if you are a beginner and this guide has hopefully made your task simpler.